Efeito de Luz
+5
LegendaryAngel
Storm™
RenanR
ProjetosMan
Sweeps
9 participantes
Página 1 de 1
 Efeito de Luz
Passo 1
Abra o Photoshop e crie um novo documento. Com a Paint Bucket Tool (G) preencha a background layer com preto.
Click here to view the small image.

Passo 2Click here to view the small image.

Criar uma textura de fibra de carbono é fácil. Crie um novo documento e usando a Rectangle Tool (U) crie quadrados em preto, cinza claro e cinza escuro como na imagem abaixo. Essa será a base do nosso pattern. Perceba que o tamanho é bem pequeno.
Click here to view the original image of 680x844px.

Passo 3Click here to view the original image of 680x844px.

Com a Rectangular Marquee Tool (M) crie uma seleção quadrada como na imagem abaixo.
Click here to view the original image of 680x704px.

Passo 4Click here to view the original image of 680x704px.

Vá até Edit>Define Pattern. Nomeie Carbon Fiber e a parte do pattern está feita.
Click here to view the original image of 680x406px.

Passo 5Click here to view the original image of 680x406px.

De volta ao documento do nosso design, adicione uma layer e também preencha com preto. Vá então atéLayer>Layer Style>Gradient Overlay. Use cinza nas cores. O mais escuro ficará na parte de baixo. Troque o Blend Mode para Multiply.
Click here to view the original image of 680x395px.

Passo 6Click here to view the original image of 680x395px.

Selecione Pattern Overlay, para Pattern selecione a Carbon Fiber que criamos no passo anterior. Troque também Scale para 60%.
Click here to view the original image of 598x473px.

Passo 7Click here to view the original image of 598x473px.

Aqui está nossa fibra de carbono no background.
Click here to view the original image of 680x432px.

Passo 8Click here to view the original image of 680x432px.

Importe o logo que quiser usar. No meu caso estou usando o logo RAWZ que criei no Illustrator.
Click here to view the original image of 644x343px.

Passo 9Click here to view the original image of 644x343px.

Vá até Layer>Layer Style. Selecione Drop Shadow. No Blend Mode use Color Burn com 50% Opacity, 90• em Angle, 2 pixels em Distance e 5 pixels em Size.
Click here to view the original image of 598x473px.

Passo 10Click here to view the original image of 598x473px.

Selecione Stroke e use 3
pixels em Size, Inside em Position, 95% em Opacity e nas cores use
#5c7a92, #000000, #5c7a92, #5c7a92, #000000, #5c7a92. Para Style use
Linear e para Angle use 90º.
Click here to view the original image of 598x473px.

Passo 11pixels em Size, Inside em Position, 95% em Opacity e nas cores use
#5c7a92, #000000, #5c7a92, #5c7a92, #000000, #5c7a92. Para Style use
Linear e para Angle use 90º.
Click here to view the original image of 598x473px.

Aqui está o logo com Layer Styles.
Click here to view the original image of 644x320px.

Passo 12Click here to view the original image of 644x320px.

Para criar a luz neon do meio é bem simples. Fiz isso no Illustrator e importei para o Photoshop.
Click here to view the original image of 680x305px.

Passo 13Click here to view the original image of 680x305px.

Selecione a layer onde quer aplicar o efeito neon e vá até Layer>Layer Style. Selecione Drop Shadow. Na cor, use preto, Color Burn no Blend Mode com 100% de Opacity. No Angle use 90º e 2 pixels em Distance e 3 pixels em Size.
Click here to view the original image of 598x473px.

Passo 14Click here to view the original image of 598x473px.

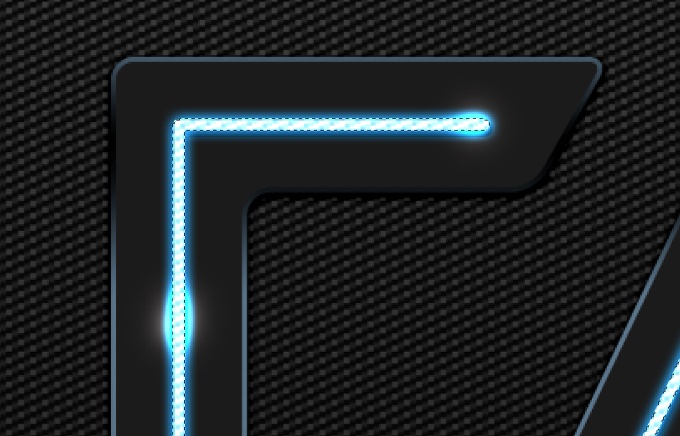
Selecione Outer Glow. Para Blend Mode use Screen, para Opacity use 100% e azul (#00a2ff) na cor. Troque Spread para 0 e Size para 9 pixels.
Click here to view the original image of 598x473px.

Passo 15Click here to view the original image of 598x473px.

Selecione Inner Glow. Use Lighten no Blend Mode com a cor cyan (ciano). Selecione também Edge e troque Size para 10 pixels. Em Quality, troque Contour para o que temos na imagem abaixo.
Click here to view the original image of 598x473px.

Passo 16Click here to view the original image of 598x473px.

Aqui está o resultado com Layer Styles.
Click here to view the original image of 680x335px.

Passo 17Click here to view the original image of 680x335px.

Adicone uma layer e a agrupe em um folder. Troque o Blend Mode do folder para Color Dodge e com aBrush Tool (B) e um soft brush, 0 hardness, pinte alguns pontos no neon para criar os pontos de luz que você pode ver na imagem abaixo.
Click here to view the original image of 680x286px.

Passo 18Click here to view the original image of 680x286px.

Adicione
uma layer dentro do folder com color dodge e preencha com a fibra de
carbono que criamos. Crie uma marquee selection da layer neon clicando
no thumbnail da layer pressionando Command (Mac)/Control (PC), assim a
layer com a fibra ficará selecionada, vá até Layer>Layer Mask>Reveal Selection.Isso vai criar um efeito de luz bacana no neon.
Click here to view the original image of 680x436px.

Passo 19uma layer dentro do folder com color dodge e preencha com a fibra de
carbono que criamos. Crie uma marquee selection da layer neon clicando
no thumbnail da layer pressionando Command (Mac)/Control (PC), assim a
layer com a fibra ficará selecionada, vá até Layer>Layer Mask>Reveal Selection.Isso vai criar um efeito de luz bacana no neon.
Click here to view the original image of 680x436px.

Aqui está nosso resultado até agora.
Click here to view the original image of 680x295px.

Passo 20Click here to view the original image of 680x295px.

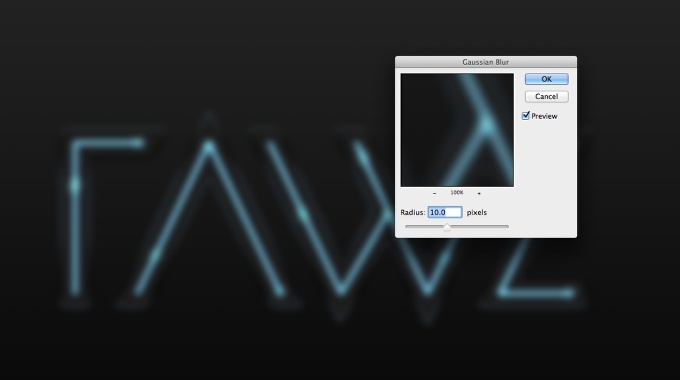
Selecione todas as layers e as duplique, depois faça merge delas em uma layer e vá atéFilter>Blur>Gaussian Blur. Use 10 pixels em Radius.
Click here to view the original image of 644x360px.

Passo 21Click here to view the original image of 644x360px.

Duplique a 'blurry layer' novamente e troque o Blend Mode da que está abaixo para Overlay e a de cima para Screen.
Click here to view the original image of 644x380px.

Passo 22Click here to view the original image of 644x380px.

Agrupe as duas layers em um folder e troque Opacity para 50%.
Click here to view the original image of 644x349px.

Passo 23Click here to view the original image of 644x349px.

Vá até Layer>New Adjustment Layer>Photo Filter. Use Cyan no Filter com 50% Density.
Click here to view the original image of 680x457px.

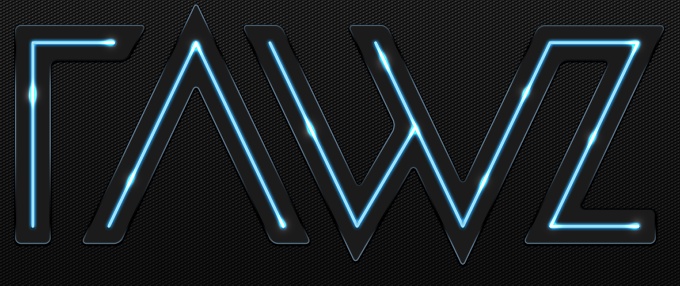
ConclusãoClick here to view the original image of 680x457px.

Aqui
está o resultado final. Como você pode ver, o processo todo é bastante
simples e a técnica é super versátil, pode ser usada para várias coisas.
Click here to view the original image of 644x360px.

Cred:
Abduzeedo
Sweeps
está o resultado final. Como você pode ver, o processo todo é bastante
simples e a técnica é super versátil, pode ser usada para várias coisas.
Click here to view the original image of 644x360px.

Cred:
Abduzeedo
Sweeps
Última edição por Sweeps em Sáb 09 Mar 2013, 17:34, editado 1 vez(es)

Sweeps- Membro Sênior

- Mensagens : 286
 Re: Efeito de Luz
Muinto Bom Obrigador Por Compartilhar com a MMORPG BR
+1 Credito
+1 Credito

LegendaryAngel- Membro Veterano

- Mensagens : 810
 Re: Efeito de Luz
o.o
Muito bom. Percebe-se realmente que é até simples, mas cria um baite de um efeito! Obrigado!
Muito bom. Percebe-se realmente que é até simples, mas cria um baite de um efeito! Obrigado!
 Re: Efeito de Luz
Ja botei os cred do cara e.e
Valeu ai por fala o nome do cara botei so subi que vc vai ver la
Valeu ai por fala o nome do cara botei so subi que vc vai ver la

Sweeps- Membro Sênior

- Mensagens : 286
 Tópicos semelhantes
» Efeito de luz solar
» Efeito de luz colorida
» [TUTORIAL] Efeito Quadriculado PT
» Efeito Sharingan
» Efeito Metal
» Efeito de luz colorida
» [TUTORIAL] Efeito Quadriculado PT
» Efeito Sharingan
» Efeito Metal
Página 1 de 1
Permissões neste sub-fórum
Não podes responder a tópicos


» Ojkjeeeee
» Naruto Great Ninja Batle
» Recrutamento de um Designer para jogo de CDZ.
» Serviços de suporte maker( Programação , Design , PixelArt ) E Vendas de Jogos
» Serviços de suporte maker( Programação , Design , PixelArt ) E Vendas de Jogos
» Serviços de suporte maker( Programação , Design , PixelArt ) E Vendas de Jogos
» Projeto Dbz
» Avaliação - Sprites Naruto
» [Sprites] DBZ (Plix)
» Super Pack - Bleach V.2
» [PEDIDO][PROJETO][RECRUTAMENTO] DYNISTYGAMES
» [PEDIDO][PROJETO][RECRUTAMENTO] DYNISTYGAMES
» [PEDIDO][PROJETO][RECRUTAMENTO] DYNISTYGAMES
» [Pedido] Contador de resets na FrmMain
» [Recrutamento]
» Ajuda erro no Cliente e Servidor do EEB 2.6!
» Como criar tilesets para Eclipse Origins 3.0 (POKÉMON)
» Recursos Pokemons
» erro frm flash
» Pedido - Pack de star wars
» [Ajuda] Sobre como por o servidor on por ip fixo
» Illusion Dimension - O Misterio do ID: BETA TESTE ONLINE
» [NSME] Naruto Shinobi Maker Engine
» Script /base,/casa Igual DBZ Forces
» [Pedido]Colar Tsunade item sprite eclipse origin
» [Pedido] Elysium
» Naruto - Recruta
» [Avaliação] - Kirito from Sword Art Online; Red and Pikachu from Pokemon.
» [Avaliação] - Kenpachi Zaraki from Bleach; Libra Shiryu From Saint Seiya.
» Demonstração de Sprites (Á VENDA!)
» [Sistema de Reset]Para Eclipse .
» Cada Guild Nascer em Certo Mapa
» Dragon Ball z Fusion A Grande Volta
» Ajuda com Ip fixo
» Como Fazer um GUI no Eclipse Origins
» Shisui Susanoo
» Fantasy Art Online
» Ajuda !!
» como passar o usuário e senha para o MainMenu?
» Ru time ero 13 Type mismatch
» Jarvis 1.3 Download
» [Avaliação/Disponibilização]Árvore 64x64
» Mlk's Zikas Signatures
» Pedido de Sistemas
» [AjudaEEB]Gerador de EXP
» [Avaliar] Base, Humano e Goblin.
» Fabrica do Tio Cronos!
» [PixelArt] Minion - Meu malvado favorito
» [Avaliar] Goku Dragon Ball Z